The Volinga Plugin for Unreal Engine can be installed in two different ways depending on your workflow: either at the project level or at the engine level.
¶ Version Requirements
Depending on the plugin version you are using, the required components differ:
-
Version 0.9.0 and later
You must install and enable both:- VolingaRenderer
- VolingaDataBridge
-
Versions prior to 0.9.0
Only VolingaRenderer is required.
Important
Starting with version 0.9.0, the plugin uses a modular architecture.
Both VolingaRenderer and VolingaDataBridge must be installed and enabled, otherwise the plugin will not function correctly.
¶ Project-Level Installation
This method installs the plugin only for a specific Unreal Engine project.
- Locate your Unreal Engine project directory.
- Open (or create) a folder named Plugins inside the project root directory.
- Extract the Volinga Plugin files into this folder.
If your project does not already contain a Plugins folder, you will need to create it manually.
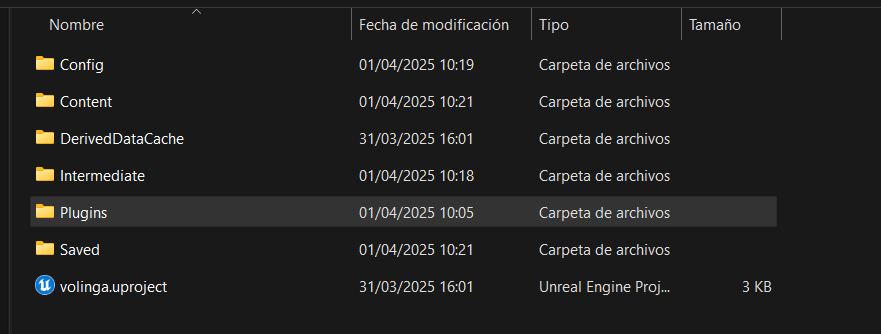

Once copied, the plugin will be available only within this project.
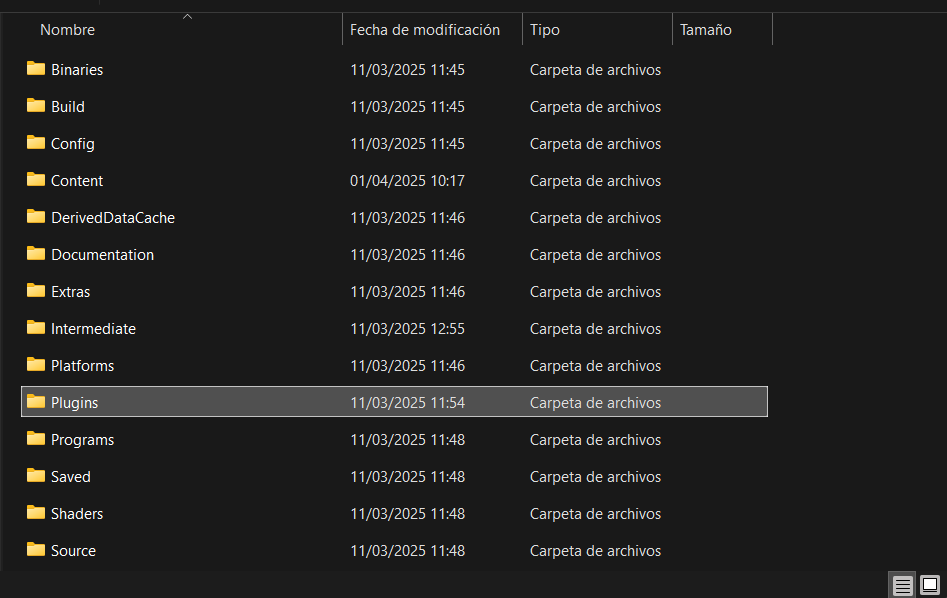
¶ Engine-Level Installation
Installing the plugin at the engine level makes it available to all projects using that Unreal Engine version.
- Navigate to your Unreal Engine installation directory.
- Go to the following path:
C:\Program Files\Epic Games\UE_5.X\Engine\Plugins\Marketplace - Extract the Volinga Plugin files into the Marketplace folder.
If the Marketplace folder does not exist, you will need to create it manually.
Important
The plugin must be placed inside the Marketplace folder in order to properly package (build) your Unreal project.If the plugin is placed directly inside /Engine/Plugins/, it will still work correctly inside the Unreal Editor, but project packaging will fail.
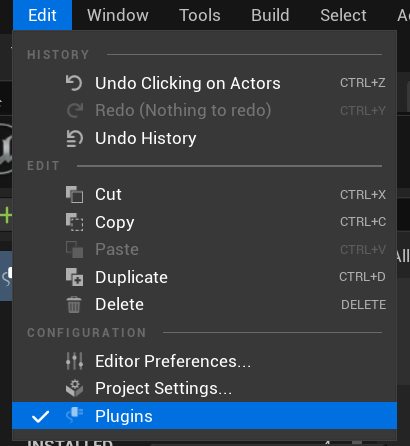
¶ Enabling the Plugin in Unreal Engine
After installing the plugin, it must be enabled within your project.
- Launch your Unreal Engine project.
- From the main menu, navigate to: Edit → Plugins
-
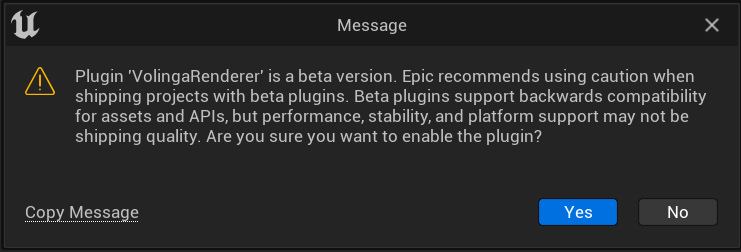
In the Plugins window, search for:
- VolingaRenderer
- VolingaDataBridge (required for version 0.9.0 and later)
-
Enable the required plugins by checking their corresponding boxes.
You may see a warning message indicating that the plugin is currently in beta.

Once enabled, the Volinga Plugin is ready to use in your project.